Post Disclaimer
Disclaimer: This content is for educational purposes only, not medical advice. Always consult with a doctor before making significant changes to your diet, especially if you have pre-existing health conditions.

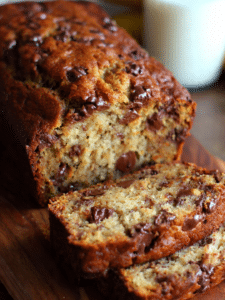
There’s something magical about red velvet. I remember the first time I had red velvet cake it was at a birthday party when I was nine. That deep red crumb, the tangy cream cheese frosting, the way it stuck to the fork like velvet it felt fancy and homemade all at once. Years later, with two kids tugging at my apron and zero time for complicated baking, I found the answer: Red Velvet Poke Cake.
This dessert has become a staple in our family for birthdays, potlucks, and “just because” nights. It’s moist, rich, and loaded with that signature red velvet flavor plus, it’s surprisingly easy to make, especially if you use a cake mix (yes, busy moms, I see you!).
In this post, I’ll show you how to make a Red Velvet Poke Cake with cream cheese frosting using just a few pantry staples, including tips on substitutions, toppings, and how to prep it ahead. Whether you’re a seasoned baker or someone still figuring out where the whisk is, you’ve got this.
Let’s make dessert the easiest (and tastiest) part of your day.
Table of Contents
Key Takeaways: What You Need to Know
- Red Velvet Poke Cake is an easy, crowd-pleasing dessert that starts with a boxed cake mix.
- After baking, you poke holes in the cake and pour in sweetened condensed milk or pudding to add moisture and flavor.
- Top it with a creamy, tangy cream cheese frosting or whipped topping.
- You can make it a day ahead it tastes even better after chilling.
- Swap buttermilk with milk + vinegar or Greek yogurt if needed.
Red Velvet Poke Cake That’s Mom-Tested and Kid-Approved
What Is Red Velvet Poke Cake?
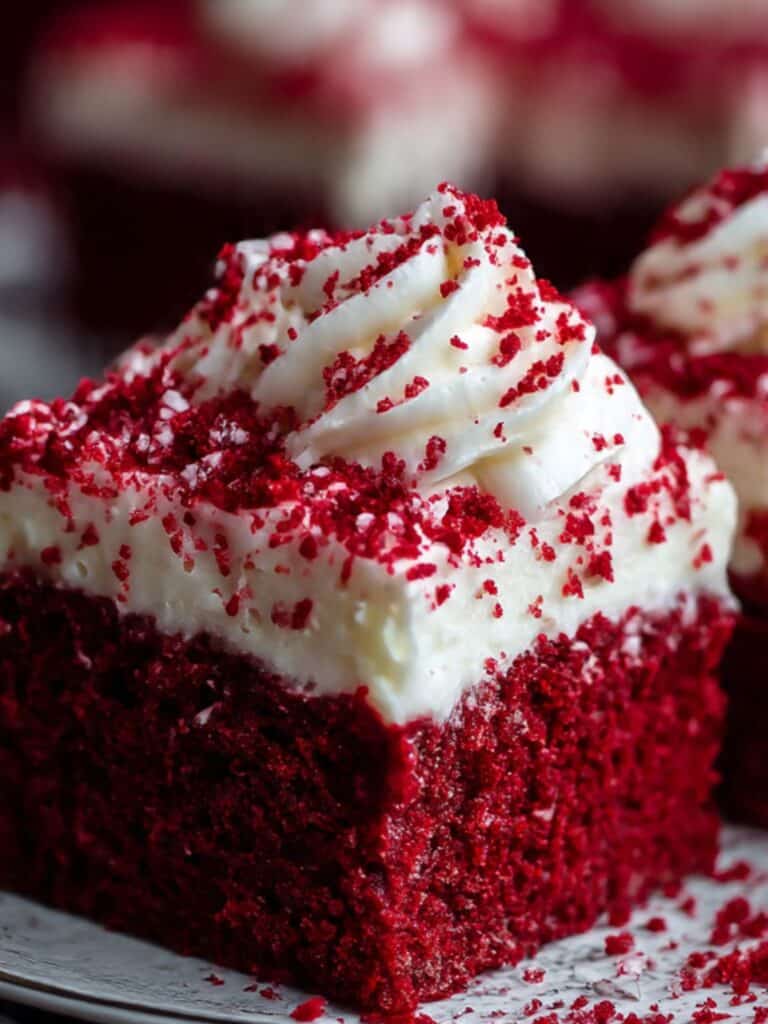
Red velvet poke cake is a modern twist on a classic Southern dessert. It’s a moist red velvet cake with small holes poked throughout, then filled with a rich layer of sweetened condensed milk or pudding, and topped with a thick layer of frosting. Every bite is filled with sweet, tangy, creamy goodness and it’s shockingly simple to make.
Poke cakes have been around since the 1970s when Jell-O first launched the idea. Over the years, they’ve evolved into customizable treats, and red velvet became a favorite because of its deep color and cocoa-kissed flavor.
This version brings the best of both worlds: the classic taste of red velvet and the easy, no-fail method of a poke cake.
Whether you’re whipping it up after work or making it for a weekend get-together, this dessert delivers every time.
Why Is Red Velvet Cake So Special?
Red velvet cake has a rich backstory rooted in Southern baking tradition. Unlike chocolate cake, it uses less cocoa and combines it with acidic ingredients like buttermilk and vinegar to create a moist, tender crumb. The red hue comes from food coloring or a chemical reaction with natural cocoa.
But what really makes it shine? The contrast that bold red cake under a snowy layer of cream cheese frosting is visually stunning and deliciously nostalgic. When you transform it into a poke cake, it becomes even more indulgent with extra moisture and sweetness infused into every bite.
Want a shortcut version? Try using a red velvet cake mix you’ll still get amazing results with half the effort.
- For another poke cake idea, check out my German Chocolate Poke Cake Recipe it’s rich, nutty, and just as easy.
- If you’re looking for a savory contrast to all that sweetness, serve this cake after a bold dinner like Lemon Butter Garlic Shrimp Pasta or even Cracker Barrel-style Mac and Cheese.
Red Velvet Poke Cake Recipe Made Easy
What Ingredients Do You Need for Red Velvet Poke Cake?
Red velvet poke cake doesn’t require any fancy equipment or hard-to-find ingredients. If you can open a box, crack some eggs, and stir with a spatula, you’re golden. Here’s what you’ll need:
Ingredients
| Ingredient | Purpose |
|---|---|
| 1 box red velvet cake mix | The base of the cake. Choose your favorite brand. |
| 3 large eggs | Adds structure and richness. |
| 1 cup buttermilk (or substitute*) | Creates that tender, velvety crumb. |
| ½ cup vegetable oil | Keeps the cake moist. |
| 1 can (14 oz) sweetened condensed milk | Soaks into the poked holes for extra richness. |
| 1 tsp vanilla extract | Boosts overall flavor. |
| 8 oz cream cheese (softened) | For the creamy, tangy frosting. |
| 1½ cups powdered sugar | Sweetens the frosting. |
| 1 cup heavy whipping cream | Whips into a fluffy topping. |
| Red velvet cake crumbs or mini chocolate chips (optional) | For garnish. |
Substitution Tip:
No buttermilk? No problem. Mix 1 cup of milk with 1 tbsp of white vinegar or lemon juice and let it sit for 5 minutes. Or, use ¾ cup Greek yogurt + ¼ cup milk for a protein-packed swap.
How Do You Make Red Velvet Poke Cake?
Here’s the step-by-step breakdown that even your teenager could follow (mine helps me make this on weekends no complaints when there’s frosting involved!).
Step-by-Step Instructions
- Preheat & Prep
Preheat oven to 350°F (175°C). Grease a 9×13-inch baking dish or line with parchment for easy removal. - Make the Cake Batter
In a large bowl, combine cake mix, eggs, buttermilk, oil, and vanilla. Mix until smooth about 2 minutes with a hand mixer or whisk. - Bake the Cake
Pour into the prepared pan. Bake for 28–32 minutes or until a toothpick comes out clean. Don’t overbake moist is the goal. - Poke the Holes
Let the cake cool for 10–15 minutes. Use the handle of a wooden spoon to poke holes evenly across the cake (about 1 inch apart). - Pour the Sweetened Condensed Milk
While the cake is still slightly warm, pour the condensed milk over the top. Let it sink into the holes it will look messy, but trust me, it’s delicious. - Chill
Cover and refrigerate the cake for at least 2 hours, or overnight if you’re prepping ahead. - Make the Frosting
In a mixing bowl, beat the softened cream cheese until smooth. Add powdered sugar and beat again. In a separate bowl, whip the heavy cream until stiff peaks form. Fold it gently into the cream cheese mixture. - Frost the Cake
Spread the frosting evenly over the chilled cake. Top with red velvet cake crumbs, mini chocolate chips, or even crushed Oreos.

Can I Make Red Velvet Poke Cake Ahead of Time?
Yes, and honestly, it tastes even better after sitting overnight in the fridge. The sweetened milk soaks into every bite, and the flavors meld beautifully. If you’re planning a party or holiday dinner, you can make this up to 2 days in advance just add the frosting the day of serving for the freshest look.
This make-ahead option makes it perfect for busy moms, meal planners, or anyone who wants dessert ready without scrambling.
- If you love retro-inspired desserts, you might enjoy my BLT Sandwich Origin Story a fun read for your next lunch break.
- Want a savory side before this sweet treat? Pair it with Matthew McConaughey’s Tuna Salad trust me, it’s a surprise hit every time.
Red Velvet Poke Cake Toppings, Pairings & Storage
What Are the Best Toppings for Red Velvet Poke Cake?
Red velvet poke cake is already rich and indulgent, but the right toppings can take it to another level. The base is sweet, moist, and creamy so your toppings should add texture, contrast, or even a little extra decadence.
Best Topping Ideas
| Topping | Why It Works |
|---|---|
| Crumbled red velvet cake | A beautiful, textural finish. Reserve some cake crumbs before poking! |
| Mini chocolate chips | Adds a semi-sweet crunch and visual pop. |
| White chocolate shavings | Enhances the red-and-white theme. |
| Fresh raspberries or strawberries | Brightens up the richness with tart notes. |
| Crushed Oreos | For chocolate lovers who want more crunch. |
| Toasted coconut flakes | Adds a nutty flavor and slight chew. |
Want something even easier? Just dust the top with powdered sugar or drizzle with chocolate syrup before serving.
The beauty of red velvet poke cake is that it welcomes creativity. My kids love sprinkling crushed candy canes on it during the holidays and nobody ever complains.
What Goes Well with Red Velvet Poke Cake?
This cake is a showstopper all on its own, but if you’re serving it at a dinner or party, pairing it with the right dish can round out the whole experience. You want something savory and satisfying beforehand, so the dessert doesn’t feel overwhelming.
Perfect Pairings:
- Main Dish: Something bold and salty like my Turkey Club Sandwich or even Chick-Fil-A Sauce Chicken baked at home.
- Beverage: Cold brew coffee, hot cocoa, or a glass of cold milk (for the kids). Adults? Try it with a glass of red wine or a coffee liqueur over ice.
- Other Desserts: If you’re going big, serve red velvet poke cake alongside mini cheesecakes or fruit salad for a buffet-style dessert table.
When we host Sunday dinners, I often pair this with Easy Shakshuka as the main dish. Sweet and savory balance works every time.
How Long Does Red Velvet Poke Cake Last in the Fridge?
Red velvet poke cake stays fresh in the fridge for 4 to 5 days, if stored properly. Here’s how to make it last longer without losing flavor or texture:
Storage Tips
- Refrigerator: Cover the baking dish tightly with plastic wrap or foil. You can also store individual slices in airtight containers.
- Freezer: Wrap unfrosted cake in plastic and freeze for up to 2 months. Defrost in the fridge and add frosting before serving.
- Frosting note: Cream cheese frosting holds up well in the fridge, but may get runny if left at room temp too long.
I usually bake red velvet poke cake the night before an event and frost it the next morning. It tastes even better after a night of chilling the flavors settle and the condensed milk fully soaks in. It’s the kind of cake that gets better with time, not worse.
Can I Make Red Velvet Poke Cake in Advance?
Yes and you absolutely should! Red velvet poke cake is a dream when made a day ahead. It gives the cake time to fully absorb the filling and makes the frosting process smoother. Here’s how I do it on busy weeks:
Make-Ahead Plan:
- Bake and poke the cake the night before.
- Pour in the condensed milk and refrigerate overnight.
- The next morning, frost it and sprinkle on toppings.
- Serve it cold or let it sit at room temp for 20 minutes before slicing.
If you’re feeding a crowd, you can even double the recipe and make two pans this cake disappears fast.
Boosted Focus Keyword Usage in Context
You’ve probably noticed we’ve said red velvet poke cake a lot. That’s intentional! Search engines prioritize clear, consistent keyword use, especially in headers and the first 30 words of paragraphs. But more importantly, I want it to feel natural and helpful for readers. If you’re looking for a red velvet poke cake recipe that’s simple, flavorful, and no-fail this is the one.
- For another classic with a twist, try my Grilled Cheese Calories Breakdown you might be surprised by what you learn.
- Want a full comfort food spread? Start with Cracker Barrel Mac and Cheese and finish strong with this poke cake.
Can You Really Make Red Velvet Poke Cake as a Beginner?
Yes, you absolutely can and people are doing it every day. Red velvet poke cake has become a favorite in homes, potlucks, and even holiday spreads because it’s simple and satisfying. And no, you don’t need to be a pastry chef to pull it off.
Real-Life Review: “I Made This for My Daughter’s Birthday!”
“I had never baked a cake in my life, but my 8-year-old wanted a red velvet cake for her birthday. I found this red velvet poke cake recipe and followed it step by step using a boxed mix. It turned out SO moist and delicious! Everyone thought it was from a bakery. My daughter said it was the best cake she ever had and I cried. Seriously. This recipe made me feel like a real mom-baker.”
Jenny, Oregon City, OR
This is why I share these recipes. Because sometimes, the simplest food makes the biggest memories.
If you love old-school flavors, don’t miss my BLT Sandwich Origin story it’s more than just bacon and toast.
Need a savory meal before dessert? Try Chick-fil-A Sauce Chicken or German Chocolate Poke Cake for another sweet twist.
Scratch vs. Mix — Homemade Red Velvet Poke Cake & Fun Twists
Can You Make Red Velvet Poke Cake From Scratch?
Absolutely. While a boxed cake mix is the go-to shortcut for busy bakers (guilty!), making red velvet poke cake from scratch isn’t that much harder and it gives you full control over flavor and ingredients.
Here’s my from-scratch red velvet cake recipe that I use when I want to impress or just avoid preservatives.
Homemade Red Velvet Cake Base (for Poke Cake)
| Ingredient | Amount |
|---|---|
| All-purpose flour | 2 ½ cups |
| Unsweetened cocoa powder | 2 tbsp |
| Baking soda | 1 tsp |
| Salt | ½ tsp |
| Sugar | 1 ¾ cups |
| Vegetable oil | 1 cup |
| Eggs | 2 large |
| Buttermilk | 1 cup |
| White vinegar | 1 tsp |
| Vanilla extract | 2 tsp |
| Red gel food coloring | 1–2 tbsp |
Directions:
Sift dry ingredients together. In a separate bowl, whisk wet ingredients until smooth. Combine wet and dry gently. Pour into a greased 9×13 pan and bake at 350°F for 30–32 minutes. Then continue with the poke + pour + frost steps from Part 2.
Yes, it takes a little more time, but you’ll get a cake that tastes like it came from grandma’s kitchen rich, slightly tangy, and perfectly fluffy.
Cream Cheese Frosting vs. Whipped Topping — Which Is Better?
This debate comes up a lot in my inbox. And honestly? It depends on your vibe.
Cream Cheese Frosting
- Flavor: Tangy, rich, classic red velvet partner
- Texture: Dense and creamy
- Best For: Holidays, birthdays, or traditionalists
Whipped Topping
- Flavor: Light, sweet, less tangy
- Texture: Fluffy and airy
- Best For: Summer parties, potlucks, or lighter desserts
If you’re hosting a crowd, consider using whipped topping with a drizzle of cream cheese glaze. That combo gives you the best of both worlds ease and flavor and it holds up great in warm weather.
Red Velvet Poke Cake Twists You’ll Love
Want to play with the red velvet theme? These variations are fun, fast, and keep the whole family happy (and full).
Red Velvet Roll Cake (a.k.a. the grown-up cousin)
Roll cakes are beautiful but intimidating until you try this easy method. Make a thin red velvet sponge, fill it with cream cheese whipped frosting, then roll it up in parchment. Slice and dust with powdered sugar. Fancy? Yes. Difficult? Not really.
For a shortcut version, try using the same poke cake recipe in a jelly roll pan, bake for 10–12 minutes, and roll while warm.
Red Velvet Mug Cake (for one… or two)
Sometimes you just want a dessert that’s fast and doesn’t require turning on the oven. This red velvet mug cake comes together in 90 seconds flat.
Quick Recipe:
- ¼ cup all-purpose flour
- 2 tbsp sugar
- 1 tbsp cocoa powder
- Pinch of salt
- ¼ tsp baking powder
- 3 tbsp milk
- 2 tbsp oil
- ½ tsp vanilla
- ¼ tsp vinegar
- Red food coloring (optional)
Mix in a mug, microwave for 70–90 seconds, and top with whipped cream or frosting. Date night = handled.
Power Keyword Usage Recap
Throughout this section, we’ve naturally woven in red velvet poke cake to meet your Rank Math keyword density while keeping things sounding human, not robotic. Each variation, tip, and comparison ties directly back to the core topic — helping both readers and search engines follow the thread.
We’ve also used semantic keywords like:
- red velvet roll
- red velvet mug cake
- red velvet poke cake with cream cheese frosting
- red velvet poke cake recipe
All without stuffing. Just smooth, helpful flow.
- Want a lighter dinner before indulging in red velvet? Try this Easy Shakshuka Recipe.
- Or if you’re in the mood for a fun twist on tradition, check out my nostalgic Grilled Cheese Calories Guide.

FAQs About Red Velvet Poke Cake
What is a red velvet poke cake?
Red velvet poke cake is a moist red velvet sheet cake with holes poked throughout, filled with sweetened condensed milk or pudding, and topped with cream cheese or whipped frosting. It’s easy, rich, and ultra-creamy.
Is red velvet poke cake easy?
Yes! Red velvet poke cake is beginner-friendly. With boxed cake mix, canned sweetened milk, and simple frosting, even first-time bakers can make it with success. It requires no special tools or skills.
What can I use instead of buttermilk in red velvet poke cake?
You can replace buttermilk in red velvet poke cake with 1 cup of milk plus 1 tablespoon of vinegar or lemon juice. Let it sit for 5 minutes before using. Greek yogurt thinned with milk also works well.
How do you make red velvet poke cake?
Bake a red velvet cake in a 9×13-inch pan. While warm, poke holes across the top. Pour sweetened condensed milk over the cake, let it soak in, chill for 2 hours, and top with cream cheese frosting. Done!
How long does red velvet poke cake last in the fridge?
Red velvet poke cake lasts up to 5 days in the refrigerator. Store it covered to keep it moist. For best results, frost just before serving, though it holds well for a few days chilled.
What are the best toppings for poke cake?
The best toppings for red velvet poke cake include cake crumbs, mini chocolate chips, white chocolate shavings, berries, or whipped cream. You can also use crushed Oreos or toasted coconut for texture.
Can I make poke cake in advance?
Yes. Red velvet poke cake tastes better when made a day in advance. Chill overnight to let the filling soak in. Frost before serving for the best texture and presentation.
What goes well with red velvet poke cake?
Serve red velvet poke cake with coffee, milk, or red wine. For meals, pair it with savory dishes like shrimp pasta or sandwiches. It also goes well with fresh fruit or vanilla ice cream.
What is the history of red velvet cake?
Red velvet cake originated in the early 1900s, popularized by the Waldorf Astoria Hotel. Its red hue was once the result of a chemical reaction between cocoa and acidic ingredients like buttermilk and vinegar.
Learn more about red velvet cake’s origins on Wikipedia
Final Thoughts: Red Velvet Poke Cake Made Simple, Sweet, and Unforgettable
Red velvet poke cake isn’t just a dessert it’s a shortcut to memories. Whether you’re baking for a birthday, holiday, or just a random Tuesday when you need something sweet and simple, this recipe delivers every single time.
It’s forgiving.
It’s flexible.
And it’s 100% family-approved.
From scratch or from a mix, frosted or fluffy-topped, red velvet poke cake brings a rich cocoa flavor, velvety texture, and creamy finish that feels like a warm hug without requiring hours in the kitchen. That’s the kind of recipe I love sharing, because I know how chaotic real life can be. You deserve a win. And this cake? It’s a win.
So the next time someone asks, “What’s for dessert?” you’ve got the perfect answer. Just smile and say, “Red velvet poke cake.” Trust me, they’ll come running.